

Patching is a release that includes improvements to the current version of the software. You can patch the ESXi host with vSphere Lifecycle Manager (vSphere Update Manager in version 6.7 and lower), but I think it’s worth trying to patch the ESXi host with the Command-Line Interface (CLI). This will allow you to practice managing ESXi with CLI.
In this article, I will show you how to patch an ESXi host using the CLI step by step.
Prerequisites
Patch download
Please read the VMware Docs article Before Upgrading ESXi Hosts before installing patches. There you will find all the checks that need to be done before patching.
You can download the exact fix you want to apply here.
Maintenace Mode
The ESXi host will be restarted during the upgrade, so make sure all running VMs have been moved to another ESXi host. This can be done by enabling Maintenance Mode on the ESXi host or in some cases you have to do it manually. If you don’t have another ESXi host in the cluster, you must shut down the VMs for maintenance.
Enable SSH on your ESXi host
1. To Enable SSH service on ESXi host using vCenter, login to vCenter, choose ESXi host, then Configure and Services.
2. Select SSH and click Start.

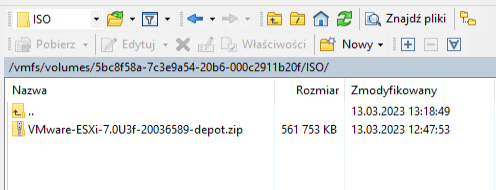
Upload Patch to the datastore
Upload the downloaded patch to a datastore using vCenter or connect directly to an ESXi host using WinSCP. I used WinSCP and uploaded the ZIP package to the local ESXi datastore.
Patching
1. Start Putty and connect to your ESXi host. Login with root credentials.

2. Enable Maintenance Mode using the following command:
esxcli system maintenanceMode set --enable true

3. Verify if Maintenance Mode is enabled using the following command:
esxcli system maintenanceMode get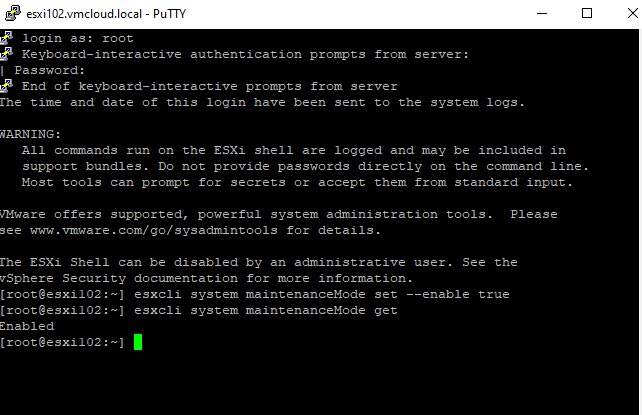
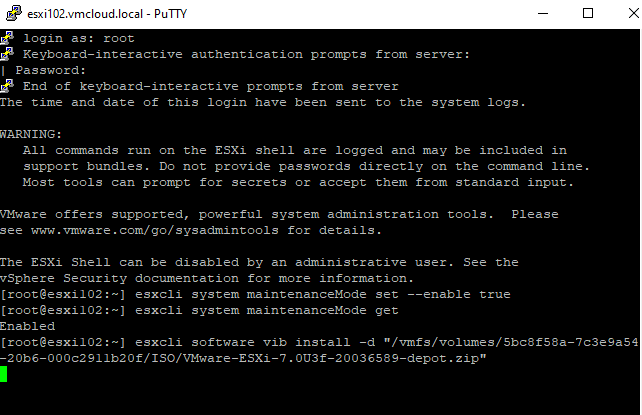
4. Run the installation using the following command:
esxcli software vib install -d "/vmfs/volumes/Datastore/DirectoryName/PatchName.zip"
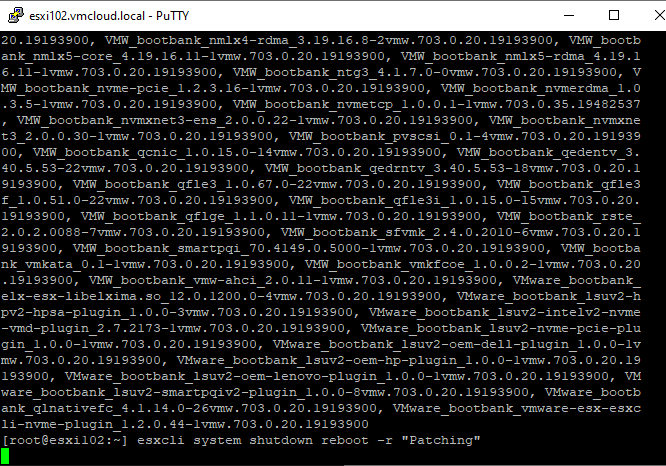
If successful, you will see the following:

5. Reboot ESXi host using the following command:
esxcli system shutdown reboot -r "Patching"
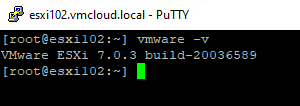
6. Once ESXi is up, confirm the version using the following command:
vmware -v
And Exit Maintenance Mode using the following command:
esxcli system maintenanceMode set --enable false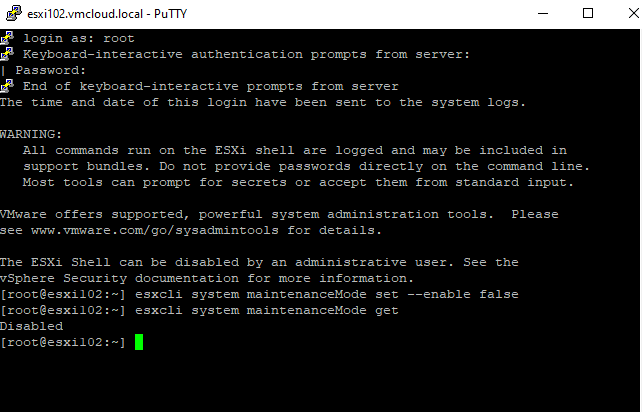
Thank you for reading! Here are some links you may be interested in:
- More articles on main page: https://vmcloud.pl/
- LinkedIn: https://www.linkedin.com/in/krzysztofsalwa/
- Twitter: https://twitter.com/vmcloudpl
- GitHub: https://github.com/vmcloudpl
- VMware vExpert: https://vexpert.vmware.com/
- VMware Communities: https://communities.vmware.com/
- VMUG: https://www.vmug.com/
- VMware Explore: https://www.vmware.com/explore.html
- VMware Store EU: https://store-eu.vmware.com/
- VMware Store US: https://store-us.vmware.com/

Leave a comment